2005 soft top window repair

PLE999
Last seen
Joined
Oct 15, 2021
Thunderbird Year
2005
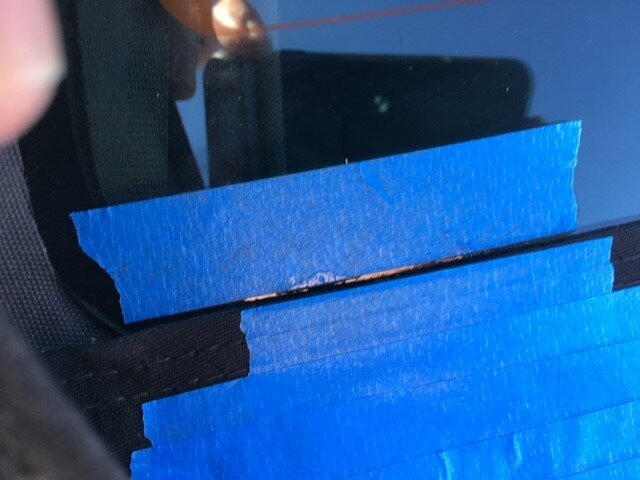
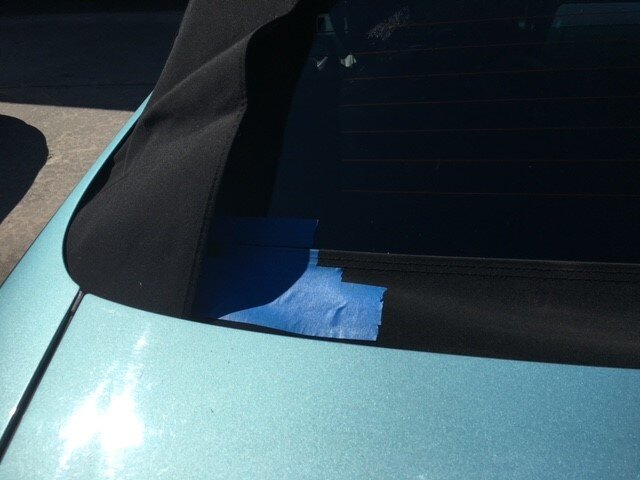
I've used these "convertible window gluing clamps" twice on New Beetle convertible. Looks like I'll have to use them on the '05 Blackbird: the bottom corners of the glass are loose.

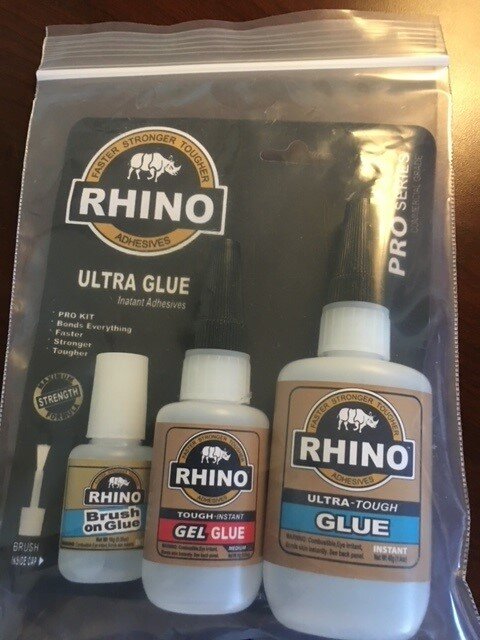
The suction cup screws lift the glass up against the underside of the fabric, while the narrow end presses the fabric against the glass. Put a cardboard box or pillows under the glass for support, then lower the top slightly to release the tension on the fabric. "Automotive Goop" does not hold long. 3M 5200 Marine Sealant holds well but is messy to use and takes days to dry.

Amazon offers various versions of these. On this on, the suction cups seem to be too stiff. They worked best when first softened in very hot water.
20220501_145613.jpg
 
Last edited by a moderator:

This site contains affiliate links for which I may be compensated. As an eBay Partner, and Amazon Associate I may be compensated if you make a purchase at no cost to you.

I have a high mileage T Bird that I am saving for parts for my two low mileage Birds. The rear convertible glass
was separated almost all the way across. I simply unfastened the top to give some slack, cleaned the rear glass
and cleaned the fabric, stuffed the top storage area with big pillows to hold the glass firmly, then reglued the
glass and fabric with GE 35 year clear silicone. Dried overnight, fastened the top back, and for two and a half
years the glued area is still good as new, and no leaks. Interesting thing is I have repaired some small issues
with this car, and it is to good to not keep intact. No oil leaks, and always starts even if left sitting for five weeks.
 
I like Pernatex epoxy for canvas/glass (they have many different ones). I've heard some use strong magnets to hold in place
 
Amazon has many different clamps designed to press the glass to the glue while it sets. I've used them on 3 different cars. Check the reviews for those with the softest suction cups. Otherwise, you must soak the suction cups in hot water, or smearing olive oil on the glass to make them stick. Note: Use a "glass adhesive". 3MMarine Adhesive Sealant 5200 works well but is very runny and tough to clean off after. It is designed to cure in damp locations, or even under water. Silicone is useless and yellows. See:
 
I replaced my top. The back window comes pressed onto plastic material. It gets stapled to to the rear cross bow of the top frame. The top itself gets stapled to the same bow and sits over the window. The top doesn’t get glued to the window assembly. Your issue right now is just cosmetic. With the top partially open I would try adding some material where I highlighted in yellow. Try to pad the back bow, it might correct the wrinkles, Good luck!
IMG_0780.jpegIMG_0781.jpegIMG_1780.jpeg
 
Last edited by a moderator:
Hello. I have a 2003 Thunderbird soft top. The rear glass window has been coming loose from the top, and leaking when it rains. Is there any way to re-set and re-seal that window? The top itself is fine, so I don't want to replace the whole top if I don't need to.

Thanks!
Ken
 
The glass was separating from the top in the lower corners when I purchased my bird. Took the bird to a shop where I was told I need a new top at the price of $1500. The top was in great shape other than the glass separation. I was able to successfully repair the separation myself. That was 4 years ago, and it is just now showing signs of needing to redo again. To date no water leakage after the repair.

I did no need to order any tools, just used what I had at home. Here is what I remember relative to the steps I employed...
Release the top and let it rest on the top of the windshield frame (releases tension on the rear of the top)
Apply blue painters tap around the area to be repair to prevent glue spillage
Wipe down glass and top where you will apply glue with rubbing alcohol
Glue together with Gorilla glue clear, fast drying, can use the gel
After gluing glass and top, I glued a strip of black waterproof material under the side flaps and over the repaired section to provide additional strength and bonding (purchased from Hobby Lobby)
I think I also applied painter tap over the joint while it was drying
Placed blankets and pillows on the inside boot area to provide support and pressure to the glass and top while the glue dried
Applied weight on the outside of the glass where I repaired it to apply pressure from the outside ( this pinched the repaired area from both inside and outside to ensure the glass and top were pressed together)
Let dry overnight and I was good to go

Here are a few pics I took to provide some visuals. I think I'm missing a few.
 

Attachments

  • Top 5.jpg
    Top 5.jpg
    57.9 KB · Views: 2
  • Top 4.jpg
    Top 4.jpg
    49.6 KB · Views: 2
  • Top 2.jpg
    Top 2.jpg
    74.6 KB · Views: 3
  • Top 1.jpg
    Top 1.jpg
    70.7 KB · Views: 2
Back
Top