2004 Brake Bleeding

B

Billstudebaker

Click here to upgrade
Last seen
Joined
Sep 6, 2023
Thunderbird Year
2004
Are there any special requirements to bleed the brakes on a 2002-2005 T-Bird? I've bled brakes several times on older cars, but not on a car with ABS. I have a power bleeder, but I don't have an adapter for the MC. I'm afraid of tripping a sensor and then having a brake light or ABS light stuck on. My brakes stop fine, but are a little soft. Car only has 14K miles, so it's been sitting a lot.
Thanks for any help
 

This site contains affiliate links for which I may be compensated. As an eBay Partner, and Amazon Associate I may be compensated if you make a purchase at no cost to you.

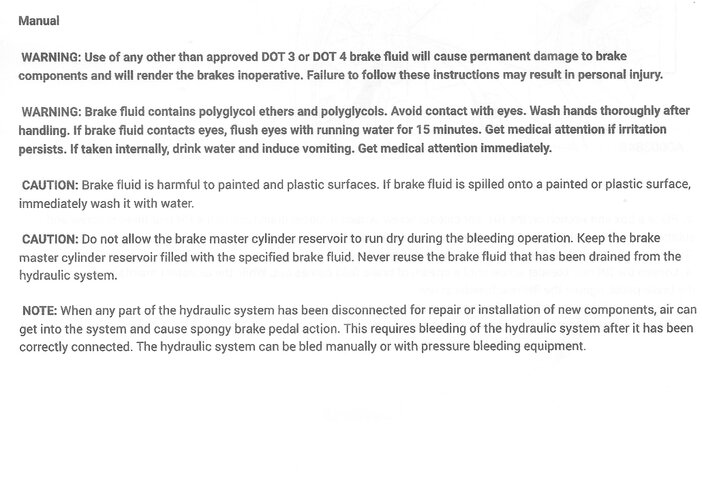
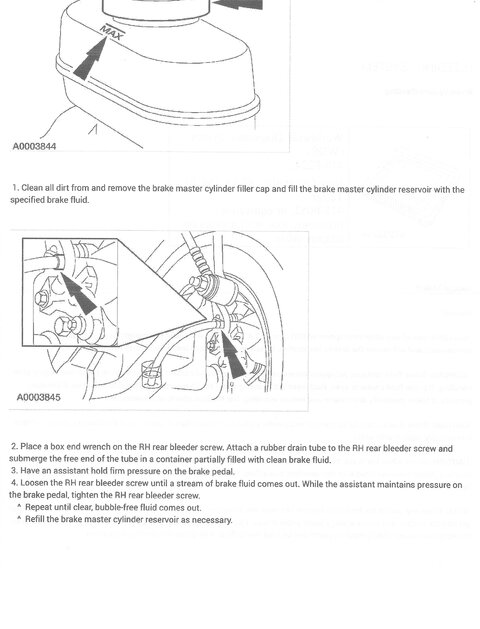
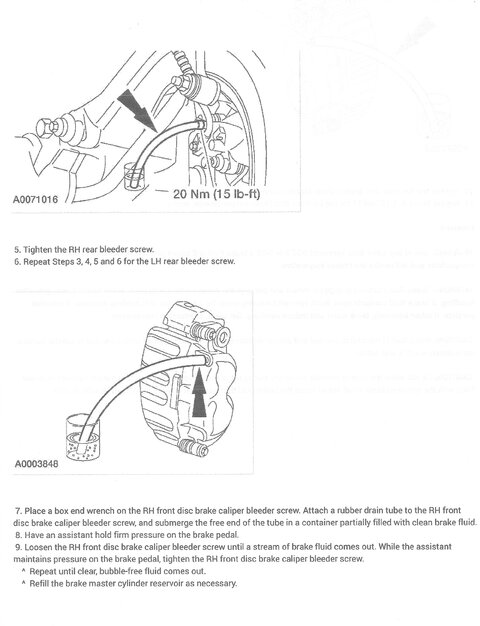
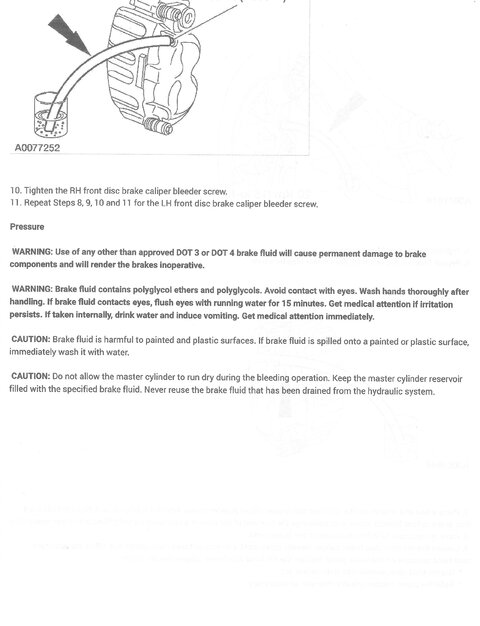
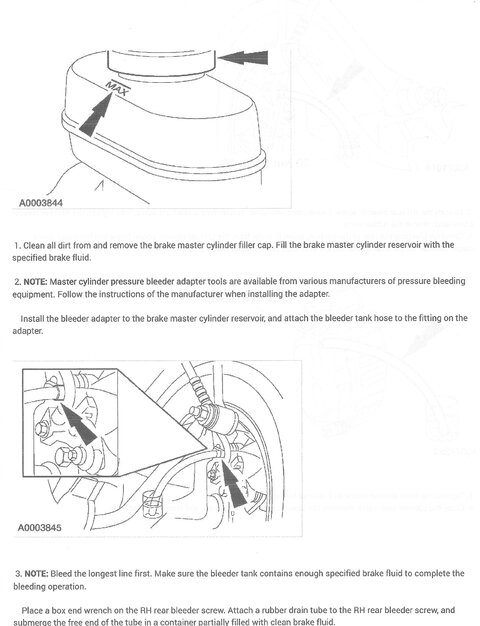
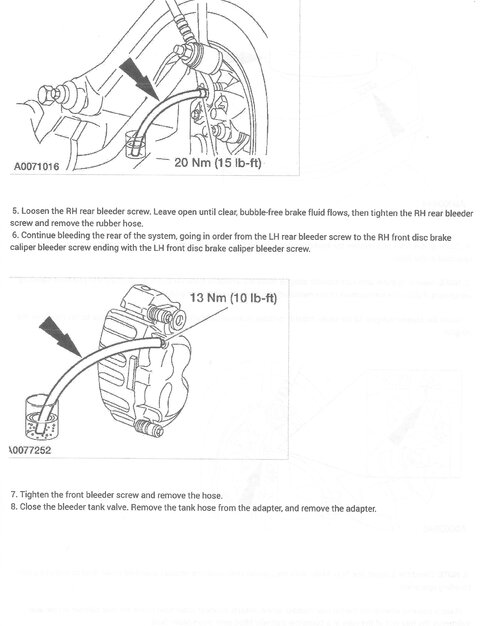
If you don't have a pressure bleeder adapter you can bleed the hydraulic system the manual way. Below are the manual and the pressure bleeding instructions.

doug7740
1955 Thunderbird Blue
Manual Brake Bleeding 1.JPG

Manual Brake Bleeding 2.JPG

Manual Brake Bleeding 3.JPG

Manual Brake Bleeding 4.JPG

Pressure Bleeding 1.JPG

Pressure Bleeding 2.JPG
 
Are there any special requirements to bleed the brakes on a 2002-2005 T-Bird? I've bled brakes several times on older cars, but not on a car with ABS. I have a power bleeder, but I don't have an adapter for the MC. I'm afraid of tripping a sensor and then having a brake light or ABS light stuck on. My brakes stop fine, but are a little soft. Car only has 14K miles, so it's been sitting a lot.
Thanks for any help
There are multiple ways to replace the brake fluid on a vehicle. I prefer the manual method that requires an assistant. Here are the steps that I follow, most recently when I replaced the fluid in my 2004 Bird.

1. Use a siphon bulb pump to remove as much of the fluid from both chambers of the master cylinder. Wipe the inside of the cylinder with a lint free rag, then re-fill with clean fluid. Be sure to check the fluid level in the master reservoir as you continue to extract the old fluid from the lines so you do not allow AIR to enter the system.

2. Start with the shortest line, left front, and pump out the old fluid from the bleeder fitting while your assistant depresses and releases the brake pedal per your command as you loosen and tighten the bleeder valve( Down --> Hold -->Up). When you see the clean fluid in the receiving cup, move to step 3.

3. Repeat the bleeding process in this sequence; right front, left rear, right rear.

By bleeding the shortest line first you reduce the possibility of having the old fluid mix with the new. When the operation is complete, the break pedal should engage with minimal effort and not feel spongy. Take the vehicle for a test drive. If not satisfied with the results, you can bleed the system again.
That's the first time I have heard anyone say to start with the shortest line. It's always been the longest line first. When I was a rep for BG Products demonstrating our PF7 commercial brake bleeding machine, we recommended the longest line first method.

By the way, BG has a tool kit that comes with their brake fluid replacement machine or is available to order. They have bleeder nipple adaptors that are very handy, especially for stuck or rounded-off nipples. Different sizes that fit over various nipples, and the other end is machined with a round I.D. Included is a silicone hose that fits into that, to lead to a dump container. The hose is clear enough to see the color of the fluid. The adaptor is hexagonal on the outside so you can use a larger wrench than normal. One size regardless of which nipple size you are working with, Very handy because the hose fits tight enough so it doesn't fall off when you are turning the adaptor.

They also have a MC cap kit that has different types and sizes of caps with a quick connect fitting for attaching the fluid hose from the machine. Inexpensive pressure bleeders come with a few caps too. One man job. After I left the company and lost the use of the PF7, I bought a cheap pump tank bleeder kit. I drilled and tapped it for an air fitting so I could use my compressor on it. 10-12 pounds is usually enough. That was when I had a vintage military vehicle with 14 bleed points. I didn't want to have to hand pump the tank.

Here is an old BG manual for that machine. Page 5 shows the nipple adaptor kit, it might still be the correct part number. Maybe you can find a shop that sells BG service chemicals that will order parts for you. Go to BGFindAShop.com
 

Attachments

  • BG PF7-013_manual.pdf
    5.6 MB · Views: 7
Last edited:
Back
Top