1956 Door Check Arm not working

knuckle47

knuckle47

Active Member
Last seen
Joined
Nov 12, 2021
Thunderbird Year
1956
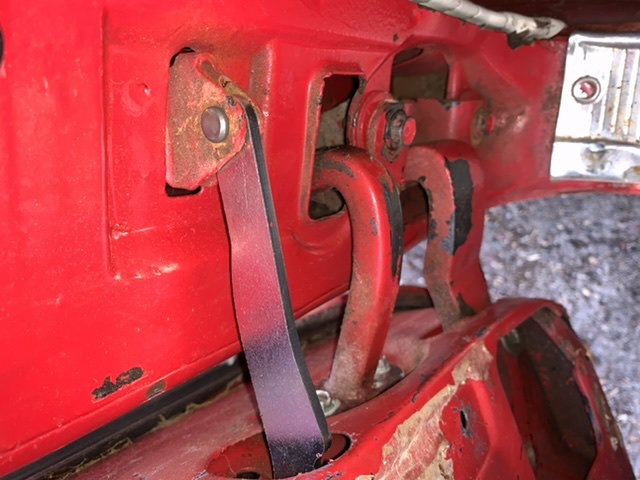
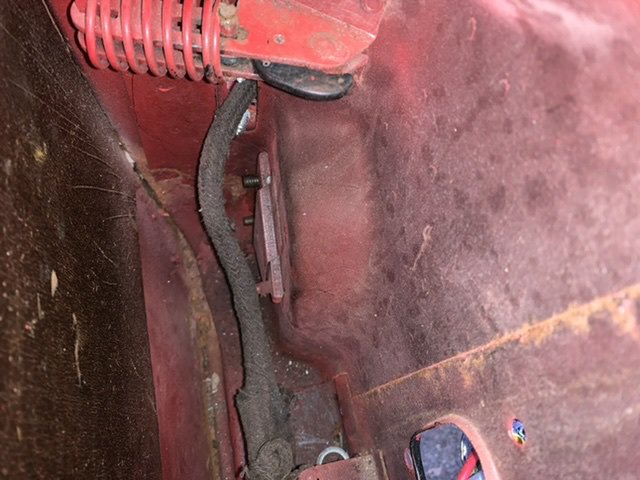
My drivers side door will not remain open via the door check arm. I have (without removing the interior door panel) discovered the attached photo in the ‘56 shop manual. Has some who has been in there confirm that this spring is what applies enough force to the arm to help keep it open.

I have enough to do without pulling that off and discovering it is not a relevant component…thank you
7E0DAD12-8FC9-40C0-88A2-A8B89D7E093B.jpegD4F70589-F40E-469D-AF53-2AECCD3504E2.jpeg
 
Last edited by a moderator:

This site contains affiliate links for which I may be compensated. As an eBay Partner, and Amazon Associate I may be compensated if you make a purchase at no cost to you.

Haven't been in there but yes that is the purpose of the spring. It may have come off the keeper. Can toy get a flashlight in there and maybe a mirror to get the right angle.
 
Took the inside door panel off. This was bugging me so I took the inside door panel off to see what I would find….there is that spring in there but it’s a tight space. I’ll try your mirror suggestion to see what I can find. I’ll try the phone too as long as I don't drop it. Discovered a few things in the “story” of the car. The power window switch has some stiff wiring and 4 of those spade connectors slipped off the the panel came off.

Someone paid attention to your comments @Ward 57 . The wires were numbered and the switch was too. Ugly but made it easy to plug it together and have it working. This car gets a complete re-wire this fall. Numbers too
 

Attachments

  • 025B488E-2D8A-4515-8C3F-61CA2FFF3567.jpeg
    025B488E-2D8A-4515-8C3F-61CA2FFF3567.jpeg
    377.9 KB · Views: 1
You are more ambitious than me. No full re-wire at this time just taking some liquid electrical tape to the broken insulation to the broken insulation connection from the wire to connectors.
Interesting that it looks like there are speed nuts and screws to hold the switch to the panel. Should just be a friction spring clip.
 
Oh yea… several “creative” modifications… zip ties, duct tape, band clamps, wood screws, metic mixed with sae. Someone used bondo to secure the panel pins in their holes. I’ll say this much…it worked. Had to crush it to take them out. Ordered a new trim plate for the switch and I have new door panels. I don’t like the screws I see on the bottom of so many panels. I’m sure I’ll need to use them eventually as these get wet and warped. Hope not but it seems likely….the screws to attach the arm rest are rust red but easily removed

I’m just thinking about sealing the back of the new panels with a penetrating epoxy sealer? I’ve used a 2 part sealer for the boat from a company called Rot Dr. The stuff is fantastic and it has been 15 years now. Paints on like water
 

Attachments

  • ED323067-4D03-47B4-B322-929C9575361D.jpeg
    ED323067-4D03-47B4-B322-929C9575361D.jpeg
    553 KB · Views: 0
Just a sheet of plastic over the metal of the door should do the trick. Should be an 'L' strip on the bottom of the door to insert the panel into as you secure the spring snap keepers around the edges.
 
Yup… I was wondering where it went…. This one is a ‘56
 
57 used the "L" strip at the bottom, 55 and 56 did not.
Originally, the 1955 door panel had a screw at the rear of the arm rest. Also, the original door panels for 1955, 56 and 57 had a screw in the lower corner. When the door panel was replaced, most times the screw in the lower corner was omitted.

doug7740
1955 Thunderbird Blue

1955 Door Panel.jpg

1955, 56 and 57 Door Panels.jpg
 
Hi Doug, I had actually noticed that when I was looking at cars. You’ve actually confirmed my thoughts on the screw. Even the noted Amos Minter has had no screw in the panel location. I have looked and seen it. Only in photos of their cars. Not like I was $hopping for one over there! My new question is :

How to I get the door check helper spring out and then either stretch it to give it more “oomph” or replace it?
 
Al,

I don't know of anyone that sells the door check spring, the only thing that everyone is selling is the door check arm and the pin. I could be wrong, but I find it hard to believe that the door check spring is the cause of your problem. Looking at your picture it looks pretty rusty at the pivot pin, make sure the check arm can move freely at the pivot.

doug7740
1955 Thunderbird Blue
 
OK It is possibly a worn door check area in the blind area. Here is another.

How does the steering wheel adjusting sleeve come off of the chrome tube? I have the entire assembly in my hand. Shaft is out, hub is loose and sll spins freely but the sleeve does not go past the loose free spot up top
 
OK It is possibly a worn door check area in the blind area. Here is another.

How does the steering wheel adjusting sleeve come off of the chrome tube? I have the entire assembly in my hand. Shaft is out, hub is loose and sll spins freely but the sleeve does not go past the loose free spot up top
Geez. It Unscrews
 
Originally, the 1955 door panel had a screw at the rear of the arm rest. Also, the original door panels for 1955, 56 and 57 had a screw in the lower corner. When the door panel was replaced, most times the screw in the lower corner was omitted.

doug7740
1955 Thunderbird Blue

View attachment 20882

View attachment 20883
Thanks for that information. I replaced the door panel with a new one after servicing the power window stuff. I did this last fall and when I went to open the passenger door The panel had slid back and was jamming on the jamb. That proper screw should prevent that in the future.
I may have not gotten the spring clips adjusted correctly So I will pull it off again and just found out there are supposed to be a couple of tap screws towards the end of the arm rest.
 
The verdict is in …the. door check arm was bad. The door kept closing on me as I’m hanging out working on something. I am also tall enough to make it rough getting in and out of the cockpit and with the door closing on me. I gave up on thinking I could get inside the door and work the spring but I did have the forethought to order a new arm and swapped it today. Despite the old and new parts looking exactly the same, the new check arm keeps the door open perfectly. Also fixed the separation of the steering wheel hub, shaft bearing and directional signals and got it all back together. Just waiting for the smaller steering wheel paint to fully cure before installing it

By the way: windy and cold today…but I was on a roll!
 

Attachments

  • D36BBE26-FF3D-476D-98C8-B9905EB507FB.jpeg
    D36BBE26-FF3D-476D-98C8-B9905EB507FB.jpeg
    114.6 KB · Views: 0
  • B98318CA-3487-49F0-B495-905A99AA3BDE.jpeg
    B98318CA-3487-49F0-B495-905A99AA3BDE.jpeg
    120.8 KB · Views: 0
  • D4FB06F7-50E6-4DC5-ABDD-5325377C00DD.jpeg
    D4FB06F7-50E6-4DC5-ABDD-5325377C00DD.jpeg
    139.7 KB · Views: 0
  • 64787689-BB1E-4606-94C1-E74E4B175D69.jpeg
    64787689-BB1E-4606-94C1-E74E4B175D69.jpeg
    92.5 KB · Views: 0
  • 7B799299-0BD0-41C7-86E2-BF61A109C667.jpeg
    7B799299-0BD0-41C7-86E2-BF61A109C667.jpeg
    99.9 KB · Views: 0
  • CCEB87BE-AA52-4FA8-858E-0A17E1AD33A4.jpeg
    CCEB87BE-AA52-4FA8-858E-0A17E1AD33A4.jpeg
    101.3 KB · Views: 2
  • 72E49C1D-56FE-4226-B772-4761147478FF.jpeg
    72E49C1D-56FE-4226-B772-4761147478FF.jpeg
    128.2 KB · Views: 0
  • 9853C0DA-1DD8-4BF5-BF0C-2C85F746EB89.jpeg
    9853C0DA-1DD8-4BF5-BF0C-2C85F746EB89.jpeg
    112.4 KB · Views: 0
Back
Top