Last August and September I spent over 2K on my 02’s Hydraulic cooling system. Two weeks ago it failed on me again so I’ve converted to an electric cooling fan.
After scouring the Forums I found very little actual help regarding the process. Lots of people said what they did and what they used however nothing in depth as to the process other than the hardest
part was removing the hydraulic pump. (It’s a pain in the ass, more on that later).
I saw one post about getting the fan shroud from an 03-05 and using that which I’m certain works well however the shroud still needs mods to wor
Another post used a fan and shroud assembly from a Dodge Ram, which I’m sure worked okay.
I particularly liked the guy that used the existing shroud and installed a 16” fan in place of th hydraulic unit. Tho he did not get in depth on how he modified it. The advantage of modifying the existing is that ancillary component mounts do not change.
No matter which way you go be prepared to not rush it. You will be working above and below the car. I started above
Before you start turn your front wheels as far right as you can, this gives you needed access under the car.
Disconnect the Battery
First you remove the
engine cover and the air intake. I also removed the
air filter box, may not have been needed but I think it helped. Also remove the plastic
trim panel that is between the
head lights so you have access to the 2 upper
radiator mount brackets.
I drained
part of the coolant because you will have to disconnect cooling lines and hoses.
Remove the
serpentine belt (you’ll need a shorter one 99”-100” I’ll post
part numbers so you can find it easier)
Drain the hydraulic system (I did not need to do this as mine had leaked it all out which is why I did this conversion). Remove the Hydraulic reservoir.
Remove the upper
radiator hose coming from the plastic cross pipe to the upper
radiator inlet.
Undo the bolt that holds the
AC receiver dryer to the fan shroud. Zip tie the receiver dryer to one of the ABS hard lines.
Disconnect the plug next to the receiver dryer and unplug from the electric
water pump.
Undo the 2 bolts holding the electric
water pump to the shroud, disconnect the electric
water pump lower hose and remove the pump.
Undo the bolts (2, one left, one right) holding the fan shroud in place.
Pushing the fan shroud toward the engine remove the 3 bolts holding the fan blade to the hydraulic
part of the fan unit. Once the bolts are off work the fan blade off, it’s tight but will come off. If you want you can remove the single nut (left hand thread so clockwise to remove it)
Once the fan blade is off you can now remove the 3 bolts inside the fan shroud that hold the hydraulics to the shroud.
With that done you can remove the fan shroud.
Now jack the right front end up and support it on a jack stand.
If you’ve never replaced the
alternator you are in for a real treat.
From under the car remove the plastic panel that comes from the bottom of the front bumper cover.
Remove 6 of the 8 bolts that hold the “X” bracing in place. ( the 2 at the front and 4 in the middle) this allows the “X” brace to drop down letting you move the lower
AC hose toward the rear of the car.
On the drivers side front crossmember is an
AC Hose bracket held in place by a 10mm bolt, remove the bolt and push the bracket up and over the crossmember.
On the passenger side there is a plastic clamp holding the
AC Hose, use a small flat tip screwdriver to get it loose. (This hose has to be pushed back toward the
lower control arm to get the
Alternator out)
There are 2 lower bolts, 1 thru bolt with a nut, a 10mm nut and an electrical connector you will have to undo to remove the
Alternator.
The rear bolt at the bottom is 15mm the front bolt at the bottom is 13mm. The thru bolt at the top front is 16mm and the nut at the back is 15mm
Undo the 10mm nut, the lower bolts and the thru bolt, I need a small pry bar to get the
alternator loose after the bolts were removed. Once the
alternator is free you can turn it to unplug the connector.
Once the
alternator is free you have to turn and twist it to get it to drop through between the
front sway bar and the
lower control arm.
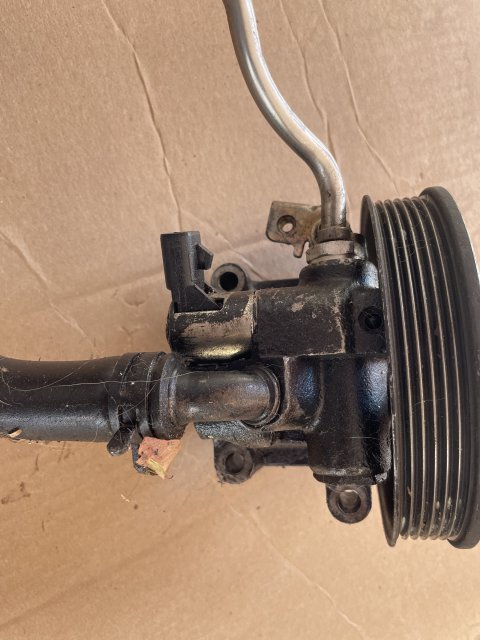
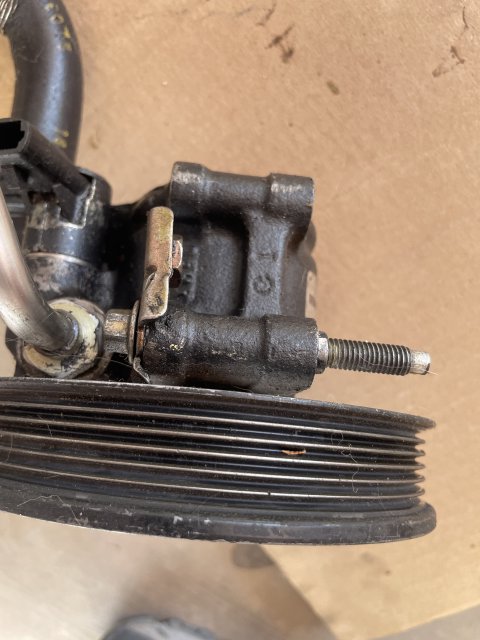
There are 4 bolts that hold the hydraulic pump in place.
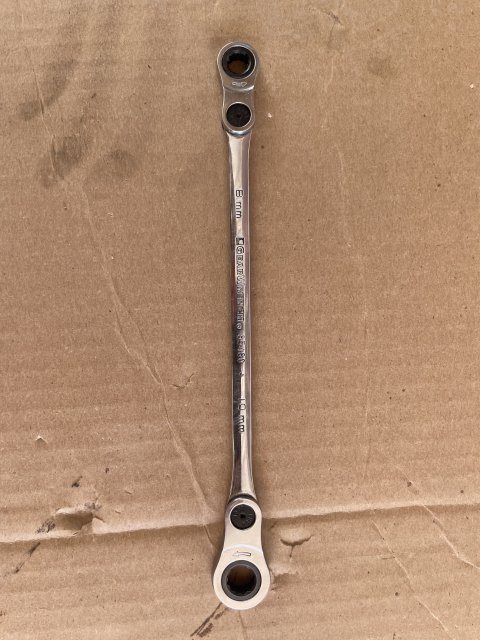
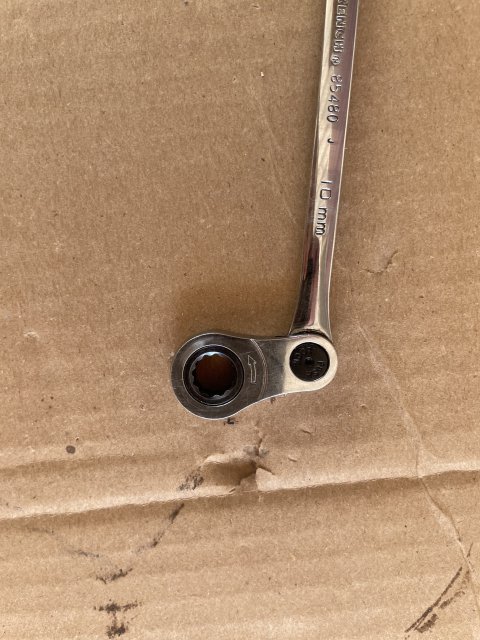
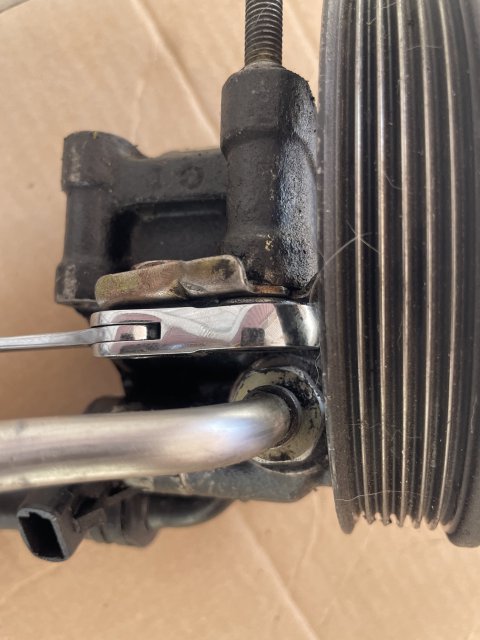
The bolts are 10mm and tighter than hell, you will need a wobble extension for at least one and a gear wrench ratcheting elbow wrench for the last one.
Remove the 3 bolts you have easy access to first because the last bolt is very hard to get to due to the stainless steel hydraulic line. (See the pictures and video).
Once the last bolt is out you can get the hydraulic pump out thru the same place you took the
alternator out.
There is a shared
oil cooler that has lines that go to the
hydraulic fan and also to the
power steering pump. They are independent of each other. As for the lines from the
hydraulic fan you have the option of just cutting them and putting a 3/8 diameter bolt in each of the hoses for the fan hydraulics (I personally thick that looks tacky). The two hoses are long enough that I brought them together, cut them and put a tube between them, above the
oil cooler between the
radiator and
ac condenser.
Reinstall the
Alternator (You might have it checked since it’s out anyway)
Move the lower
AC hose back in place, reattach the clamps. Bolt the “X” brace back in place. Reinstall the plastic panel.
You are now set to lower the car.
Install the shorter
serpentine belt the only change to the routing is that instead of going under the upper idler pulley the belt now rides on top of the upper idler pulley.
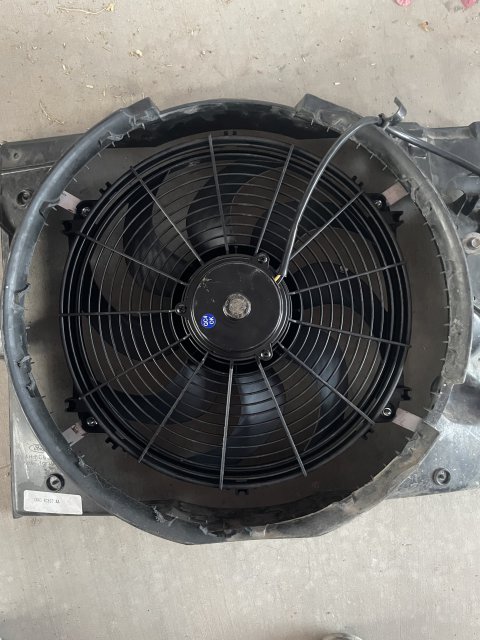
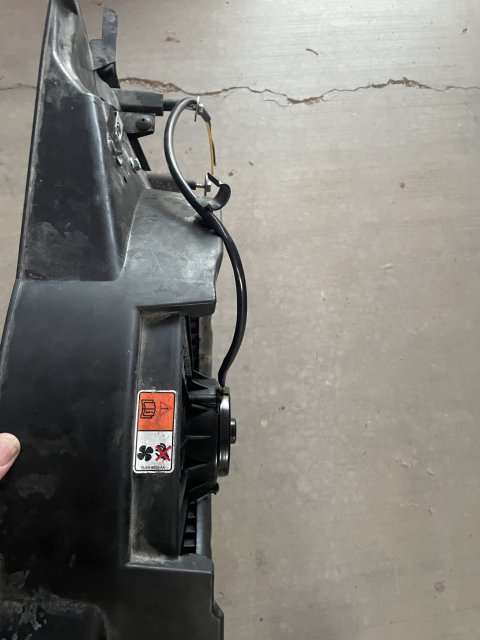
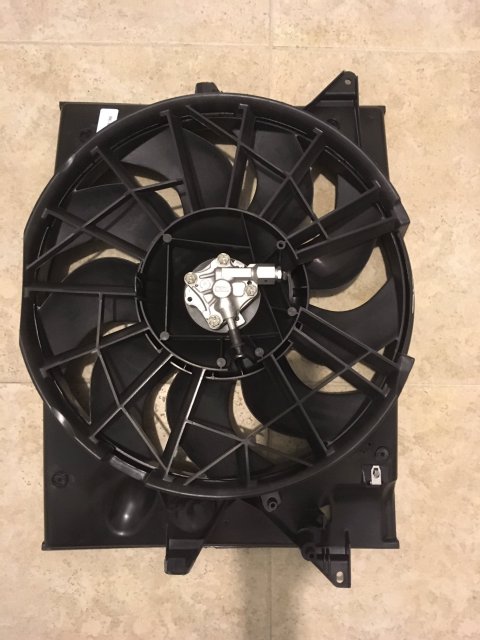
For my Electric fan I got a Hayden 3710, it’s 16” and fits decently in the modified fan shroud. I also used their 3652 controller tho in retrospect I would not need the temp sensor as I’ve wired mine to run once the car comes on. You do have to reverse the fan blade to change from push to pull and when you hook up the wiring you use the yellow wire as the positive.
Modifying the Fan Shroud.
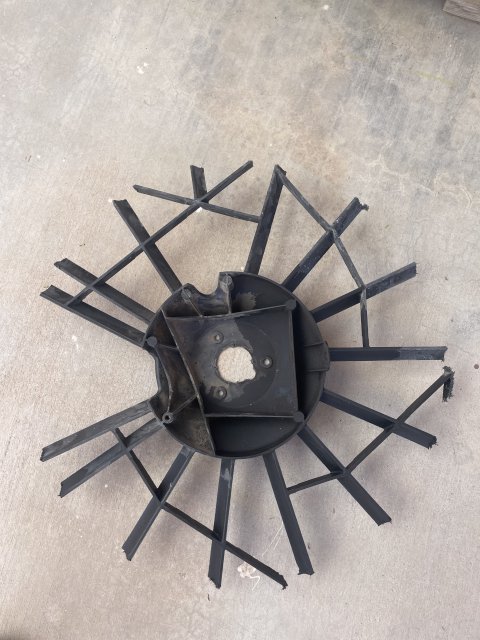
If you have access to a reciprocating saw or a jigsaw it goes very quickly.
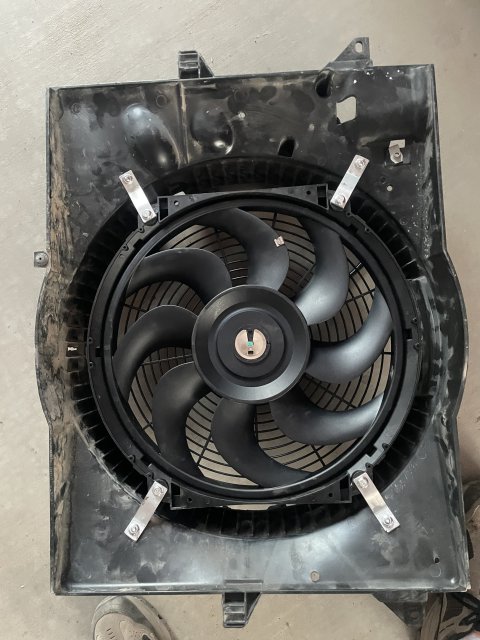
You cut out the spider center out of the shroud (see the picture)
Once removed you now can mount the electric fan.
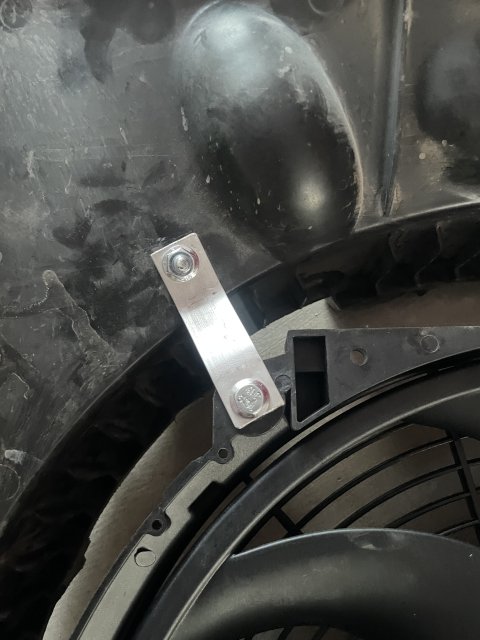
I made 4-3” aluminum brackets that hold the fan to the shroud. The bending was done using a vice and a hammer getting the angles correct took a little fine tuning as once they are bolted to the shroud you do not want them to warp the fan surround and bind up the fan blade. I used 6mm flange bolts and nuts. I do not remember the length.
Once you have the fan bolted to the fan shroud apply voltage to make certain it runs freely.
Install the modified fan shroud and reinstall the electric
water pump, remount the receiver dryer. Reconnect all your hoses.
As for the electric hook up I ran everything from the fuse block to the left of the ABS system.
One fuse is switched and I simply pulled the fuse and ran the exposed wire down inside of that fuse location and put the fuse back in to trap it. That wire is the green wire that uses low voltage to close the higher amperage for the fan. The fuse location I used was for the
fuel injectors.
The red high amperage wire I simply attached using a spade connector to an unused hot in the fuse box.
I ground the electric fan using a bolt for one of the
radiator supports and a jumper wire to ground the relay.
There are 2-25
Amp fuse holders that are
part of the fan controller that I zip tied in place to insure that that do not come loose (might be over kill but I don’t want to run the risk.
99”
Serpentine Belt Continental 4060990
100”
Serpentine Belt Dayco 5061000
I live in Southern Arizona, I’ll let everyone know if there is an issue with Temperature as the summer gets hotter.
The other thing you have to do is bleed the cooling system. There is a bleeder valve specifically for this between the brake
master cylinder and the
coolant reservoir.
First fill as much coolant as possible at the cap on the
thermostat housing. Then turn the key to the on position so the electric
water pump comes on. Turn the key to off, top off at the
thermostat housing and replace the cap. Start the car and bring it to temperature, have the heat set to maximum temp. Using a small pair of channel locks hold the bleeder valve toward rear of the larger
part. Use a flat tip screwdriver and unscrew the end until you see coolant coming out (it will have lots of air) once you have a steady stream coming out. Do this several times
