1969 Ford Thunderbird complete overhaul

Notice: This site contains affiliate links for which I may be compensated. As an eBay Partner, and Amazon Associate I may be compensated if you make a purchase at no cost to you. Thank you for your support!
Ford-Galaxie-Galaxy-Rear-Lower-Control-Arms-1965-1974-FG-204-3.jpg

Ford-Galaxie-Galaxy-Rear-Lower-Control-Arms-1965-1974-FG-204-2.jpg

Ford-Galaxie-Galaxy-Rear-Lower-Control-Arms-1965-1974-FG-204-4.jpg

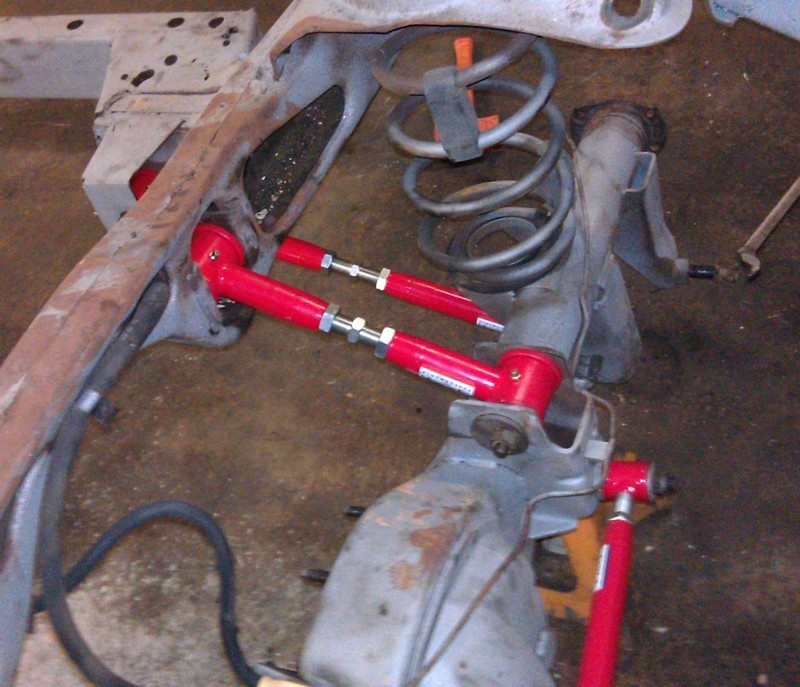
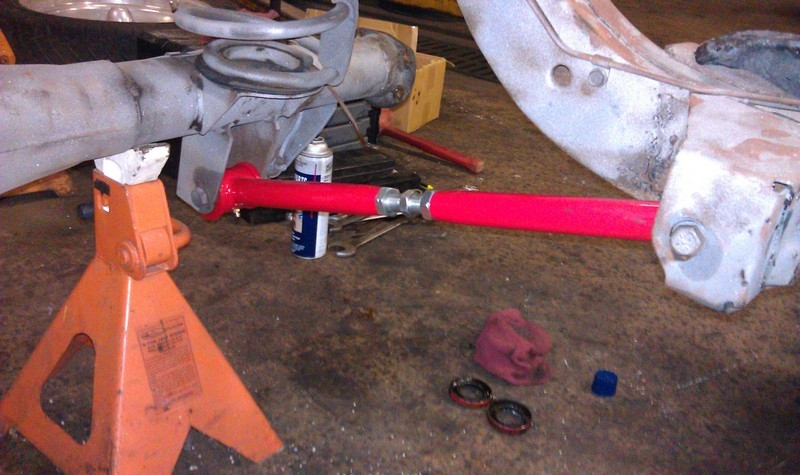
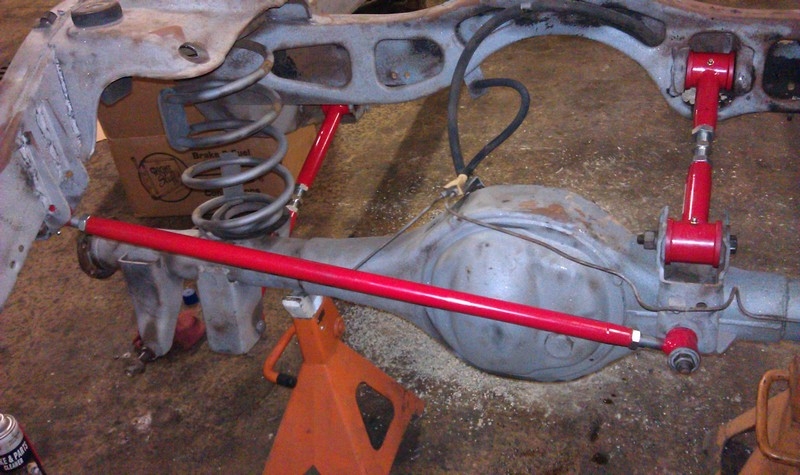
If you notice the mounting points are pretty much the exact same locations. It looks like a 9" May be an 8" (though I doubt they put an 8" in there with the 390 or 429), rear on there as well. Same control arm mounting locations as well as the upper control arm with the EXACT same mounting bolt with washers on it. Even coil spring too! So I would say if you are wanting new probably stronger suspension parts for your rear grab them! I know I am.
 
Back again with another update! Finally got the back all wire brushed and painted. I did a layer of Eastwood rust converter, then their rust encapsulator and then finally a coat of protective enamel. Tomorrow I am going to apply the rubberized undercoating to seal it all up! A little run in the enamel probably due to me being too close to the metal, but no matter. Once the fuel tank goes back in you'll no longer see it. I am also going to coat the fuel tank in the rubberized coating as well to keep it from corroding as well. Oh and one last question for anyone in the know. What gear oil should I use for the rear when I put it back together?

One last note: This car no longer has its original 429 in it. A previous owner had removed it and stuck in a 460. Well at least I think that due to the block being a late 70's to early 80's 460 block. Casting number on the block D9TE-AB.
IMG_0287.JPG IMG_0288.JPG IMG_0289.JPG IMG_0290.JPG IMG_0291.JPG IMG_0292.JPG
 
Update! Finally got everything back together under the car! All I got now is to replace the master cylinder and power booster then I can bleed the brakes and take it out for exhaust work. Pictures!
IMG_0304.JPG IMG_0305.JPG IMG_0306.JPG IMG_0307.JPG IMG_0308.JPG IMG_0309.JPG IMG_0310.JPG IMG_0311.JPG IMG_0312.JPG IMG_0313.JPG
 
That's great information, thanks! My frame has rot in same area, and I plan to fix it the same way.

I laughed when I saw how you painted things. I thought I was so terribly original. :)
20181029_175031.jpg
 
That's great information, thanks! My frame has rot in same area, and I plan to fix it the same way.

I laughed when I saw how you painted things. I thought I was so terribly original. :)
View attachment 2962
Ha! Nice! Good old red neck paint booth I say! I picked up a mig welder from Eastwood that runs off household current. I cut out the rust and welded in the steel then painted both sides with their rust encapsulator then top coat. Took me from April to almost the end of August to get her back on the road.
 
Back
Top